Showing posts with label Professional Equipment. Show all posts
Showing posts with label Professional Equipment. Show all posts
Ancillary Task Edit Decisions
Much like with my Music Video, I decided it was necessary to produce an edit decisions document for my ancillary tasks. The following document shows these decisions:

Edit Decisions
Instead of an edit decisions list as I made the Music Video, I decided it would be much more useful to wait until I had finished the video to detail every single editing technique and complex shot choice in the following document. I believe it sufficiently details the effort I put into my work:
Artist Logo
An important element of my ancillary tasks - and my main task should I choose to include it - is the artist logo. This reveals the identity of the artist and, in most cases, becomes the one image a fan or even anyone can look at and immediately know the artist.
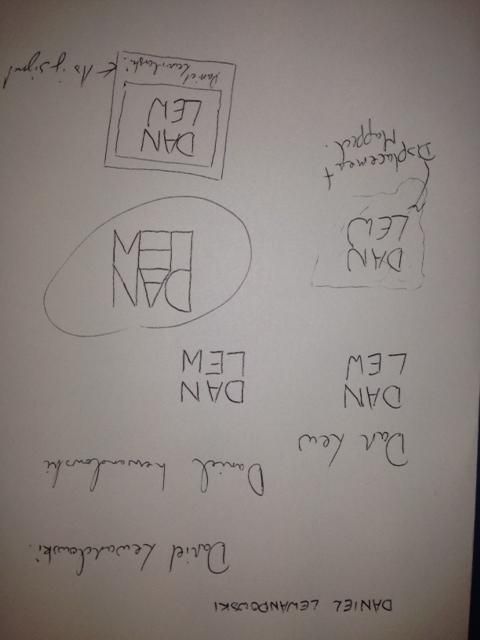
Logos vary immensely; I carried out a small amount of research before beginning the task, but only to grasp an idea of what has been done as it is important that they remain original. I then began mocking designs, playing with the artists name, Daniel Lewandowski, to find a structure for his name:


 After this, I worked on my first draft. This design involved a crumpled piece of paper - in-keeping with my website - that the text was formed to. To achieve this result, I used a displacement map in photoshop. This involved altering the contrast and brightness of the background image to make the contours much more obvious. The map is then applied to the text which then forms itself to the paper and appears to be written on it. This process created:

 The second design involved the inclusion of a Polaroid picture background with a signature caption for a bit more personality as the first design wasn't overly complex or revealing of the artist/brand. The font I used was Jellyka Saint Andrews Queen as it caught my eye as a very detailed, personal font that could be mistaken as true handwriting, which is rare. Utilising the way the font alters characters to drawn images, I added some extra characters for decoration:


 I really like this logo as it feels like it contains all of the elements I wanted and serves as a memorable brand identity. Finally, I put the logos up for a vote amongst my peers to ascertain which was the best when my audience was concerned. Luckily, the final logo reined as champion and I agreed with my demographic. This design, therefore, will be the logo I will use in my tasks.
Logos vary immensely; I carried out a small amount of research before beginning the task, but only to grasp an idea of what has been done as it is important that they remain original. I then began mocking designs, playing with the artists name, Daniel Lewandowski, to find a structure for his name:
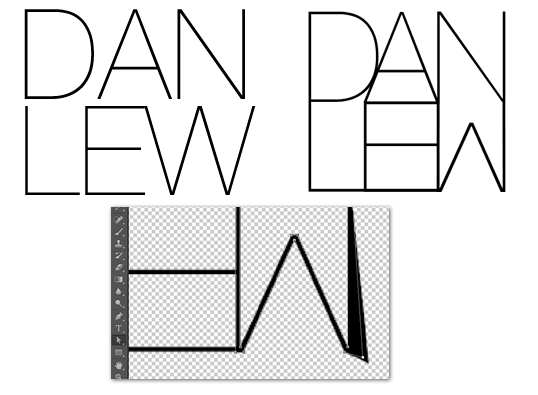
Once I had done this initial planning, I moved on to experimenting in Photoshop. I had already formed the idea of what I wanted to create so it was up to following my plans from here. The most important element of all of my designs was the specific way in which I designed the lettering so the first port of call was to create that. My favourite, san-serif font is Helvetica and the slightest version of this is Helvetica Neue Ultralight so that was the end choice. The font needed a fair bit of editing, however, so I converted the letters to paths in photoshop and reshaped them until they resembled what I wanted. The image to the left is the original font where the right image is the final result:
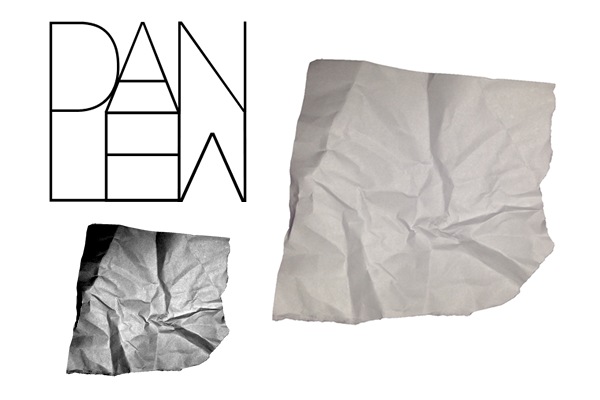 After this, I worked on my first draft. This design involved a crumpled piece of paper - in-keeping with my website - that the text was formed to. To achieve this result, I used a displacement map in photoshop. This involved altering the contrast and brightness of the background image to make the contours much more obvious. The map is then applied to the text which then forms itself to the paper and appears to be written on it. This process created: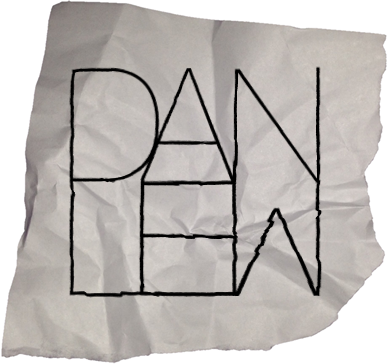
Logo 1
 The second design involved the inclusion of a Polaroid picture background with a signature caption for a bit more personality as the first design wasn't overly complex or revealing of the artist/brand. The font I used was Jellyka Saint Andrews Queen as it caught my eye as a very detailed, personal font that could be mistaken as true handwriting, which is rare. Utilising the way the font alters characters to drawn images, I added some extra characters for decoration: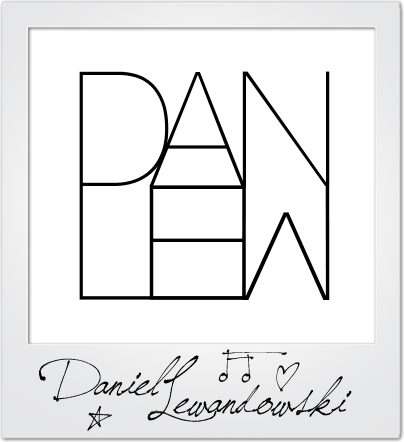
Logo 2
The design didn't look quite right to me and I even asked for feedback too, which a final idea flourished. I offered up the idea of a background image that was slightly blurred so as not to take away from the logo, but add colour and more of a persona. The logo then became:
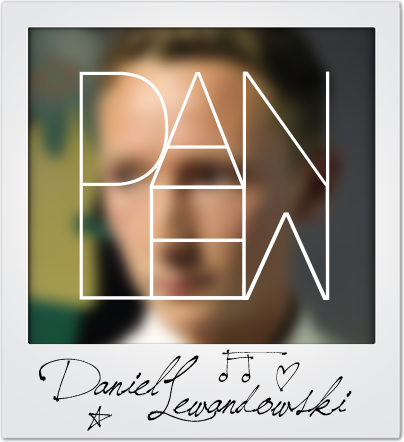
Logo 3
 I really like this logo as it feels like it contains all of the elements I wanted and serves as a memorable brand identity. Finally, I put the logos up for a vote amongst my peers to ascertain which was the best when my audience was concerned. Luckily, the final logo reined as champion and I agreed with my demographic. This design, therefore, will be the logo I will use in my tasks.
Green Screening and Rotoscoping
As part of my initial first video shoot, I incorporated a green screened shot which meant I could securely film my action without the shake or risk of being in a moving car. To embellish the chromakeyed area, I rotoscoped masks over the window behind the actress - having to form a mask around her facial features.
Due to the complex movements she made, tweening the keyframes was not 100% effective so I manually altered it for every frame of the 6 second clip which amassed to over 150 separate frames. The end result does look professional and I'm very proud of the effect it produces. After changing my actors, however, and after receiving feedback from peers, I have decided not to use green screen for the refilming of the scene or for subsequent shots. The process if very time consuming and I do believe the achieved result may not be worth the time it will take away from the projects schedule.
Recount of First Video Shoot
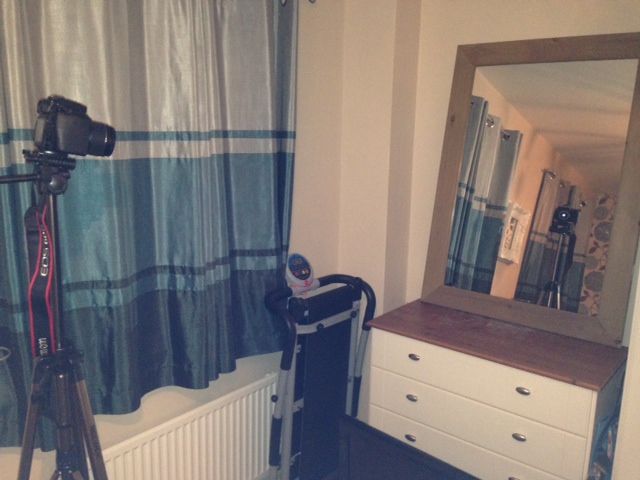 The first video shoot was to complete all of the external and non-venue location scenes so that the main focus is to secure the venue shots when I have received confirmation of a location. As the filming involved only a few scenes and was my first shoot, I want to evaluate the work shot by shot below, detailing changes I made in production and how they will benefit me in the long run. Unfortunately, due to the sheer mass of shots that will be filmed on location, I won't be able to be as detailed with every shot, but will ensure all changes are noted for exposition on either my blog or overall evaluation. Shot 35 and 39 were omitted in filming as I decided they were unneeded.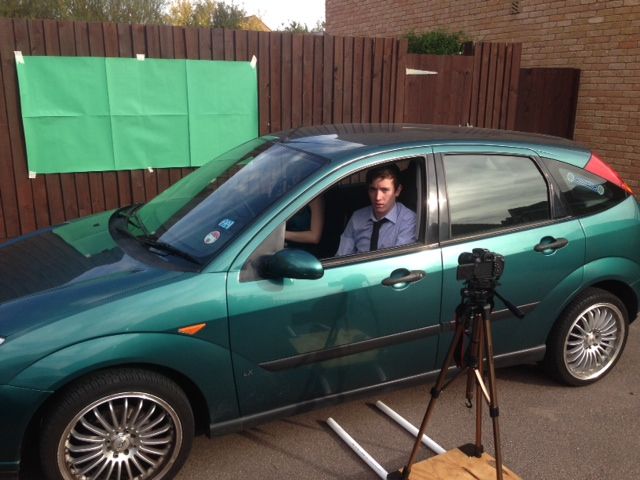
The above is evidence of the most adventurous shot of the day; I will delve further in evaluating it when I reach it below, but it required the use of a green screen, two actors and a camera dolly. This will then be post-produced to give the effect that the car is moving.
Shot 25

This shot needed to be precisely framed, though once it was it looked very nice. When I conceptualised the shot, I did not anticipate how the reflections would work, but the overall idea was clear. I also decided that the scene would flow easier if I swapped the two characters around which was decided on the shoot.
Shot 26
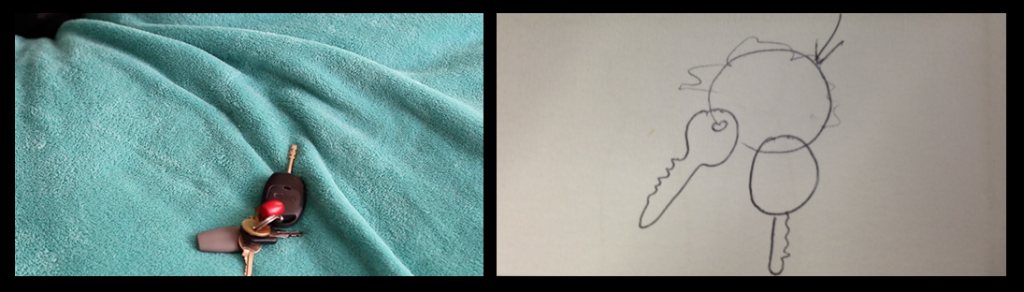
This shot worked as expected, I focused the lens with the keys in shot to begin with to perfect it, before removing them to begin filming. I am glad the keys weren't entirely central as the shot then looks less set up.
Shot 27
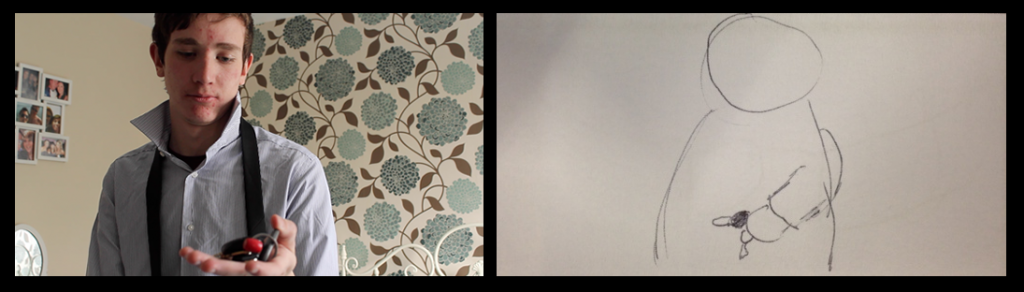
As it was a tracking shot, this took a few takes, but worked as expected so didn't take any longer than needed. I like the framing and focus of the shot - offering a close mid shot which reveals the emotion of the actor.
Shot 34
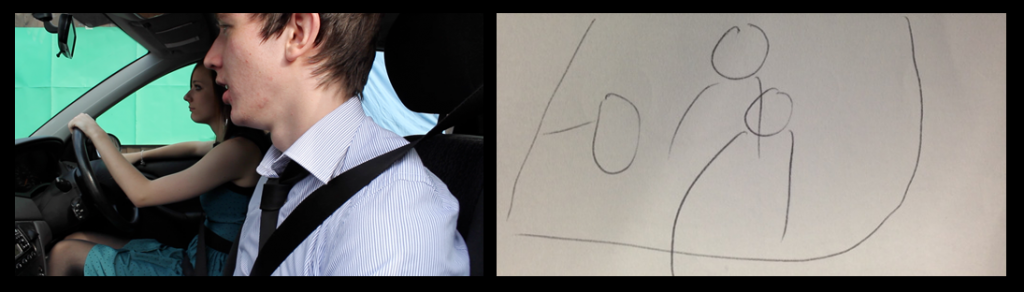
Having begun the chroma key aspect of this shot, editing out the green and background of the car, the shot is proving very effective. The process does, however take a very long time requiring rotoscoping and keying. Any remaining green edges are also removed when I desaturate the video in post production.
Shot 34.5
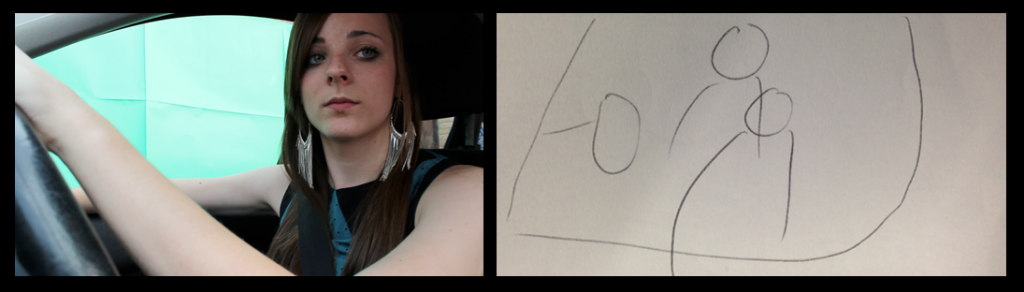
This shot also was difficult to rotoscope as there are green reflections on the actors hair, though after rotoscoping and post production it looks realistic and serves it's purpose.
Shot 36
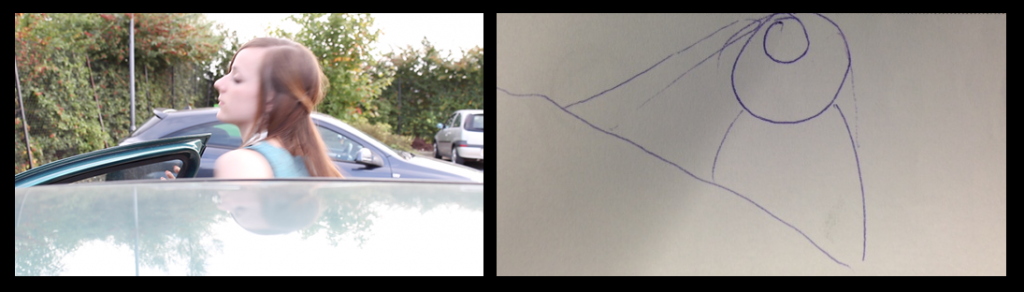 Again, taking a couple takes to ensure the shot was correct, I like the final shot and an unplanned element which is the shake of the camera as the door slams is really effective, i feel.
Shot 37 & 38
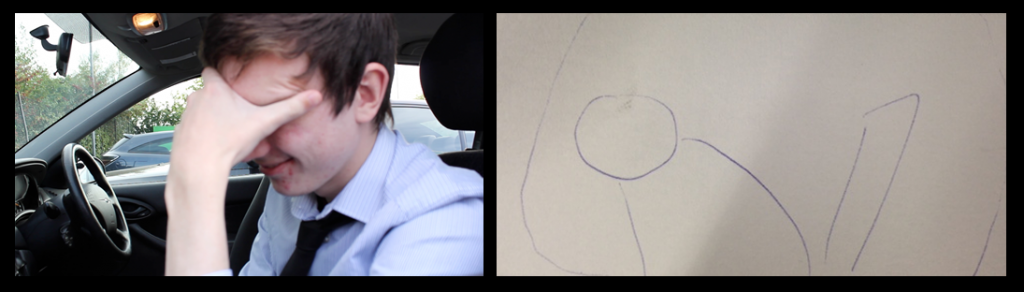
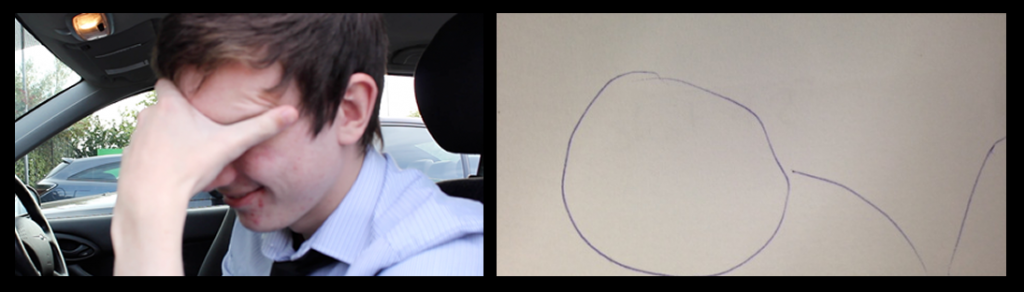
Directing the actor slightly differently from the storyboard, I chose not to have the actor leaning forward which effects the timing of the following shot which will now be a slightly zoomed version of the same footage.
Shot 49 & 50
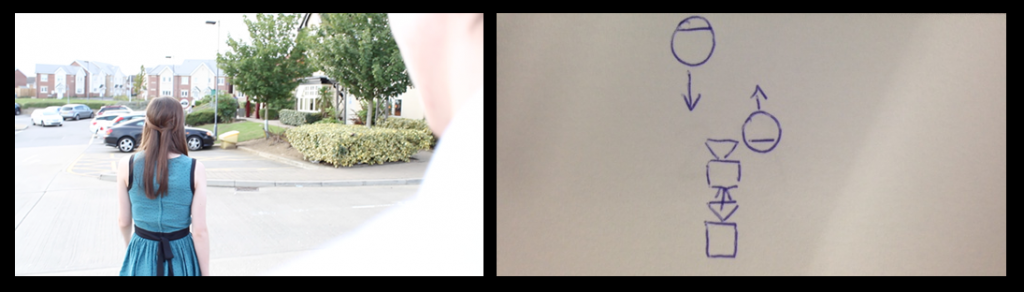
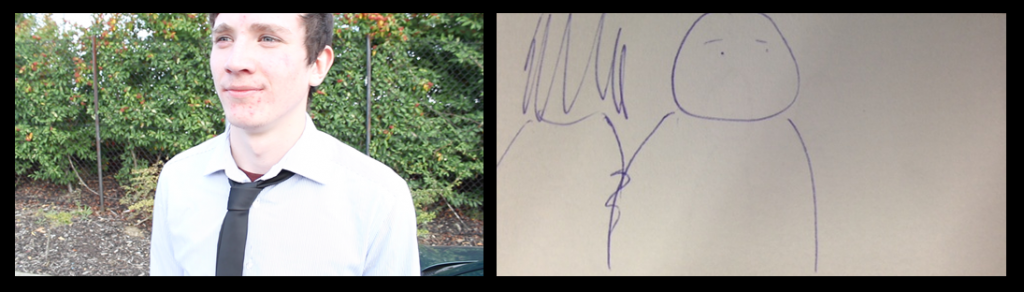
The content of this shot is slightly different though the effect is the same; rather than a barge of the shoulder I have the male character calling after the female who turns and then walks on as if to 'snub' him. The next shot is a reverse shot to show the male characters reaction and I feel this shows well. I would, however, like to lower the lighting in post production so it is not so glaring.
Shooting Plan for First Video Shoot
The first scenes I plan to film are few, but one of which quite adventurous which requires a small amount of forward planning. The first requires the dressing of a bedroom set to film a long take flashback in a mirror, though the second involves me artificially making a car look like it's moving while it is, in actuality, stationary and creating the special effect of the camera moving through the cars window. Most of the work on this scene, however, will be done in post so it should not complicate filming so much. Below is my shot list and below that a plan of Shot 34 which is the most difficult:


Shot 34
Equipment needed:
- Camera Crane
- Camera Dolly
- Tripod
- Greenscreen
The shot involves a slow zoom in to the window of a car while it is apparently moving. The camera will show the effect of dissolving through the passenger door window and showing the argument from within. This will be added in post production via motion tracking in Adobe After Effects. To achieve the slow zoom and eventual ending of the camera being inside the car, I will be mounting my camera crane on my camera dolly so that I can track towards the car on the dolly and the extended arm will enter the car. This must be extremely smooth as, even though I am using motion tracking, the smoother the shot the more professional it shall eventually seem. Before tracking, some of the area around the car may be visible which I must either mask out or ensure they are covered by the green screen.
Camera Difficulty

Not only for this project, but to have my own high quality, professional device for filming future projects and taking still images, I decided to upgrade my camera. I previously had the Canon EOS 1100D which was used for my AS Level Media film, but does not provide the same film quality as the more advanced models. As a replacement, I decided to purchase the Canon EOS 650D, which is the cheapest model which offers 1080p video recording, but still has a similar ISO range.
Unfortunately, however, the company I 'purchased' the camera from was illegitimate and there were hidden costs which I was not notified of before purchasing. Cancelling this order, I then had to work extremely hard to retrieve my money as a refund, resorting finally to claiming through PayPal due to the difficulty the company posed.
Once the money came through from PayPal, I decided to find a reputable, high street company to purchase the camera from which posed another problem. Most stockists do not offer the 650D, though they do offer other models. I, therefore, began to look at the 60D which is a fair few models up from the 650D, let alone the 1100D and provides a much higher quality of video and stills. It also supports a greater range of features which are well worth the extra price. I, therefore, knowing should I order this I would never need another camera, opted for the 60D.
Now that I have the camera, I can begin filming which has kept me behind slightly.
Equipment Choice


Alongside this, I am using the tripod I used for my AS Production which is very lightweight, but sturdy so can be used for stable shots, but is portable enough for stabilised, handy cam shots.
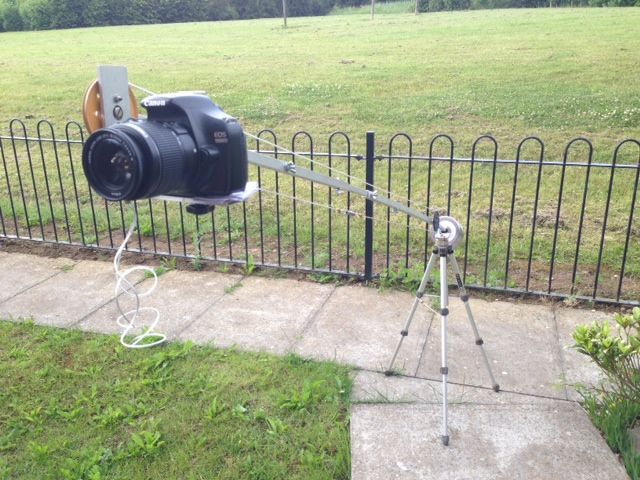 On top of these two, essential pieces of equipment, there are a number of specialist implements I plan to use which will embellish and accentuate my project perfectly, adding that desired professional feel. These include the Camera Crane I have already featured a post on and a soft box of my own design and build. Below are a few pictures of the process and explanation of it's components.
Soft Box
The soft box consists of:
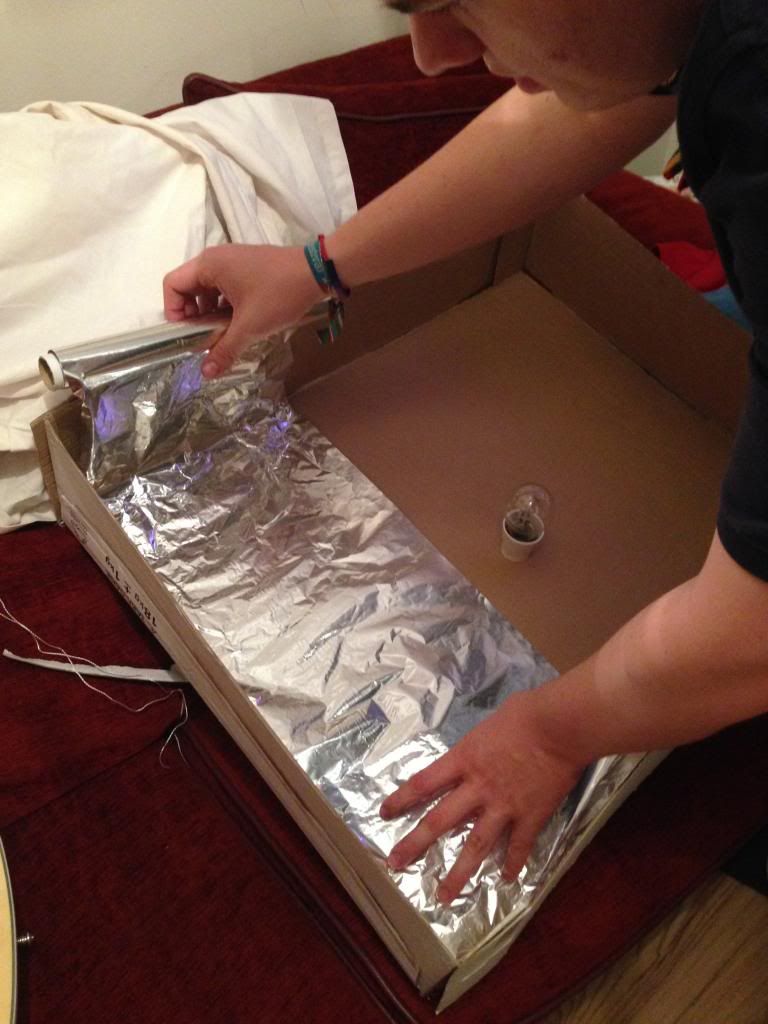

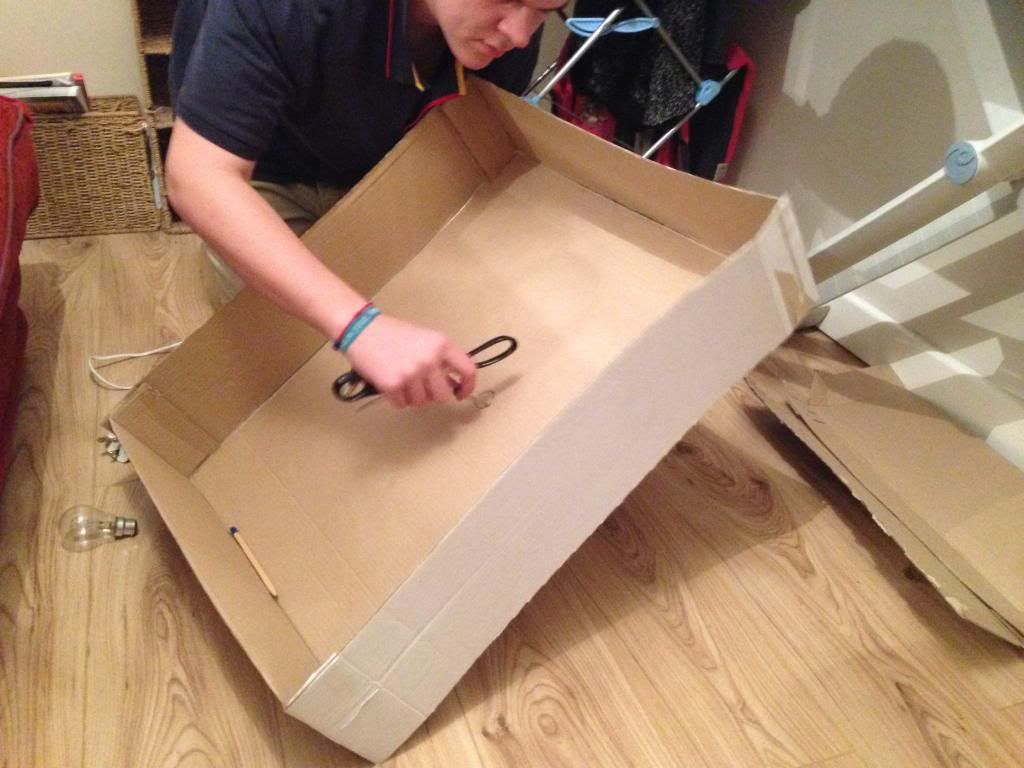
Forming a small, lidless box out of larger sheets of cardboard, I began the softbox. I then measured the circumference of the clamp light so that it could be mounted in the box' back.
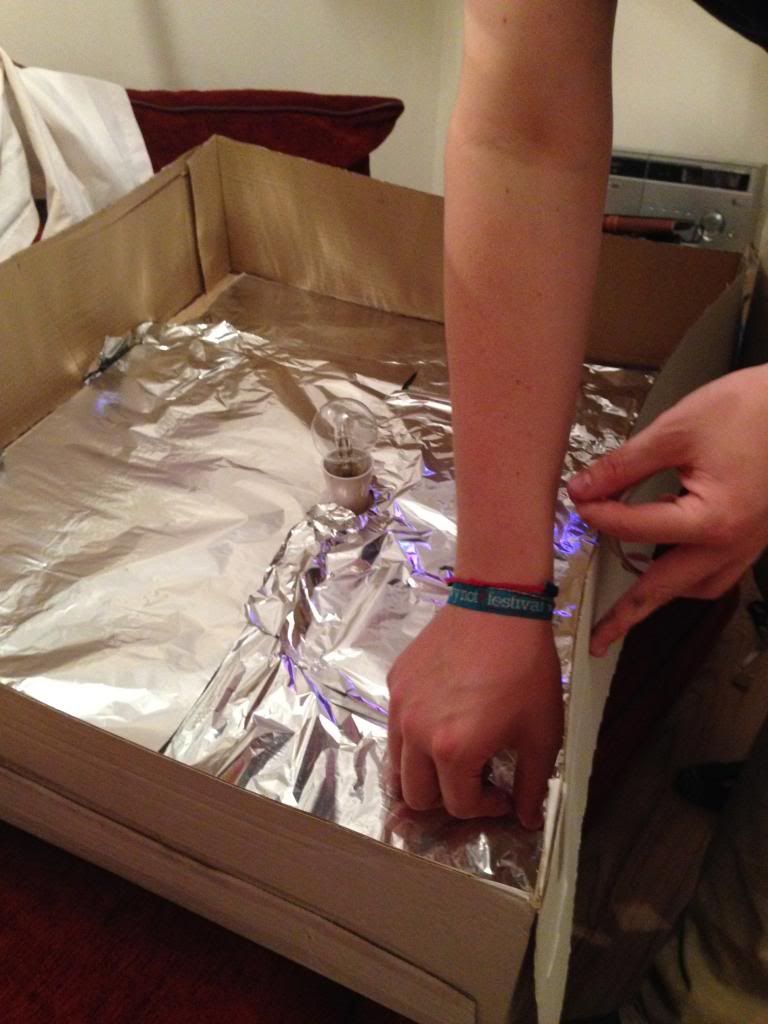
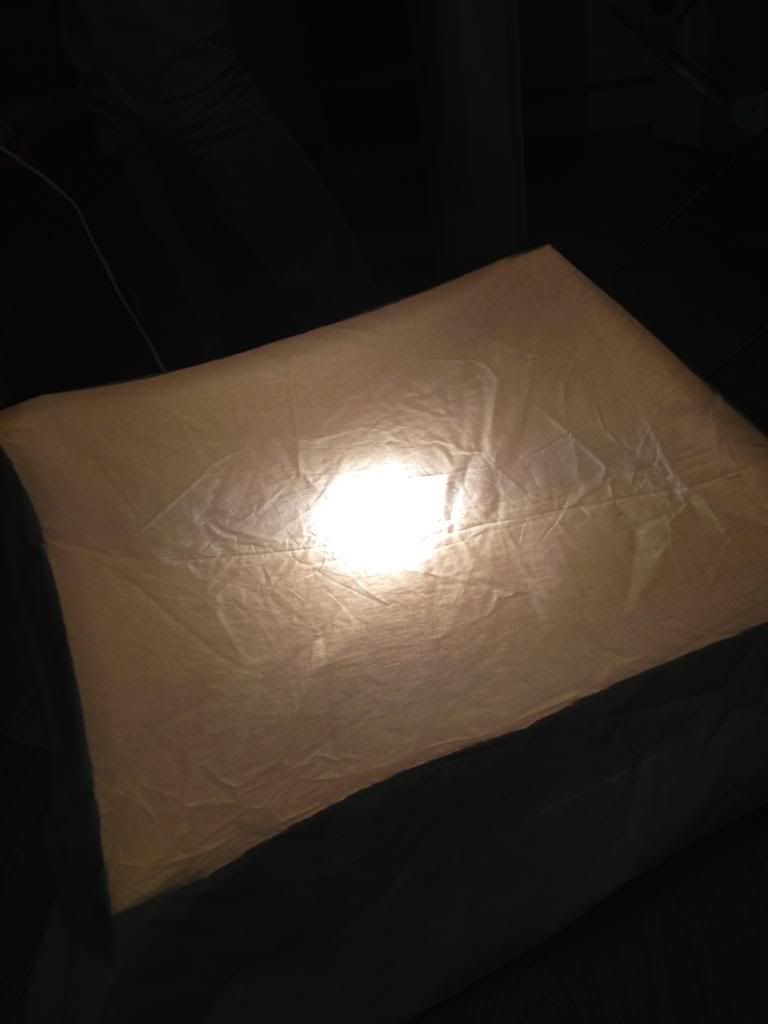 Firstly, I placed the white sheet over the cardboard at this time, but the light did not reflect enough around the box and was too central (left). To remedy this, I decided to line the box with tinfoil which works by bouncing the light around the box and then through the dampening sheet.
With this lining, the light spreads much better and it can even be used without the sheet as a powerful 'flood' light should my setting be dark enough for it. This is a very cheap, but effective way of achieving a well lit scene and it should help a lot for production. As the light bulb is a tungsten, indoor bulb I may have to alter the white balance on my camera for the scenes I involve this in - especially if it will be the main source of light for the shots.
Revision of Shot Design
Some of the shots in my storyboard are quite adventurous. Those that are adventurous can be categorised into those that I know will work, but may need some planning before hand and those that I have never tried before and cannot be sure will work.
 To remedy this, I revised the shot and now know how I will successfully produce it. Acquiring green paper from the Art department at my school, I have been able to redesign a working shot using a portable green screen where the background of the acting scene does not need to be the same and it can be superimposed over the top. To acquire the shot I will film the scene twice. The first shot is a 360 pan around a spot as if there were characters in the centre. To accompany this, the green screened shot will involve the actors dancing and spinning on the spot to recreate the camera movement. Editing these two together, if the speed is the same, will look like the shot was filmed as one and the movement is entirely natural.
The most difficult of these is a ghosted shot made up of two identical shots, one with just the background and one with the background and actors. Overlaying these two shots and reducing the acting layers opacity produces a ghosting effect.
 I have other shots similar to this, but the difference here is I want the camera to slowly track around the characters. To produce the effect I would need to reproduce the exact same movement for two separate shots. Due to how difficult this is, I attempted to test the shot which added the obstacle I expected; producing the same movement is nigh on impossible and I can not be sure I will be able to do so smoothly.
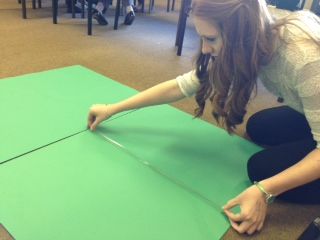 I have other shots similar to this, but the difference here is I want the camera to slowly track around the characters. To produce the effect I would need to reproduce the exact same movement for two separate shots. Due to how difficult this is, I attempted to test the shot which added the obstacle I expected; producing the same movement is nigh on impossible and I can not be sure I will be able to do so smoothly.
 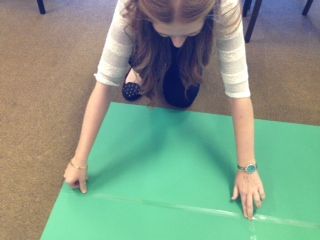 To remedy this, I revised the shot and now know how I will successfully produce it. Acquiring green paper from the Art department at my school, I have been able to redesign a working shot using a portable green screen where the background of the acting scene does not need to be the same and it can be superimposed over the top. To acquire the shot I will film the scene twice. The first shot is a 360 pan around a spot as if there were characters in the centre. To accompany this, the green screened shot will involve the actors dancing and spinning on the spot to recreate the camera movement. Editing these two together, if the speed is the same, will look like the shot was filmed as one and the movement is entirely natural.
Camera Dolly
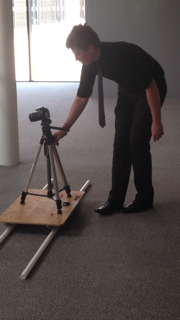
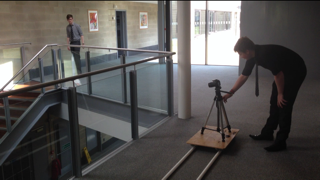 Along with a colleague that I worked with last year for my AS Production, I designed and built a portable camera dolly for complex tracking and moving shots. Using the schools facilities and a small budget subsidised by ourselves, we created a very useful implement that when used correctly produces really nice, professional looking shots.
What we found, however, was that without weighing down the board of the dolly, the movement was shakey. Our progression in learning about this process can be seen by the steadiness of the final shot. We decided to borrow weights from the Science department which worked perfectly.
Assembly
The main components of the dolly were as follows:
- 3m PVC Pipe x2
- Wooden Board
- 8 identical bearing wheels
- 4 steel angle plates
- Miscellaneous 1/4" nuts and bolts
A creation such as this required a small amount of equipment and as my Uncle - who helped me with the crane - was unavailable for this project, we utilised the available facilities in school. These included:
- Pillar Drill
- Alan Key
- Pliers
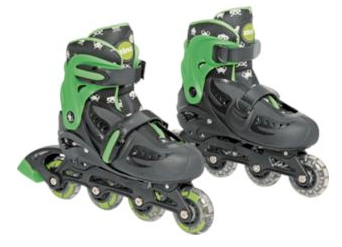
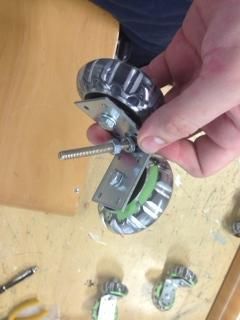 The most important component was acquiring the identical wheels. Upon researching these wheels, we found that individually they were quite pricey and bulk ordering didn't help much. We, therefore, decided the best route would be to purchase rollerblades and dissemble them. This being the most expensive aspect of the build costing us £14.99, though saving us in the long run. We mounted the resulting wheels to angle plates which could be suspended below the board to run on the PVC pipe.
The end result was a great, low budget dolly that, with the right execution, can create beautiful, professional shots.
Camera Crane (Jib)
It's important to me that the shots I use in the Music Video are as well created and professional as possible, so not only do I have to plan them meticulously, I have begun searching for the best equipment to attain these shots. Due to this, I recently began work building a Camera Crane to film smooth, swooping shots that are conventional to the Music Video text and also the acoustic performance genre.Many of the parts were sourced from spares around mine and my Uncle's house, so we were able to create a high quality piece of filming apparatus for very little cost. The build consists of:
- Old, sturdy tripod
- 4m Aluminium Square Tubing of varying widths
- 2 Aluminium L brackets
- 2 Bearings
- Meccano Pulleys
- Insulated Cabling
- Dumbbell weights (Varies according to Camera weight)
- Miscellaneous Bolts
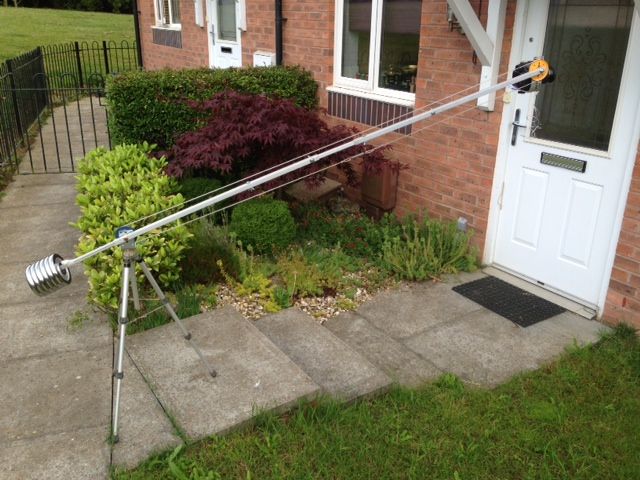
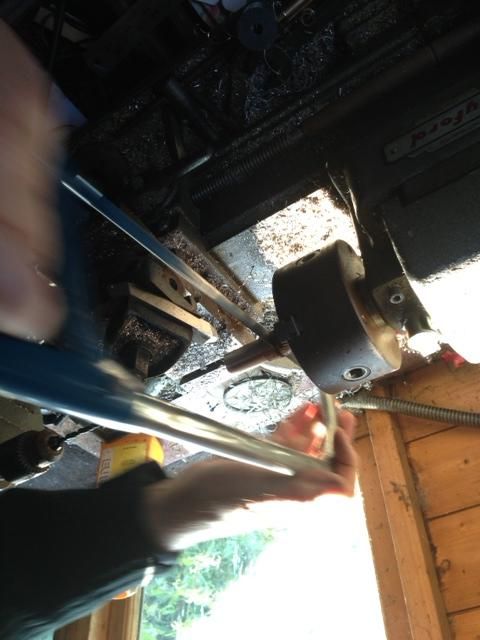 Some parts were actually machined especially to specifications for parts to fit, such as washers and separators for the pivot and unfixed pulley (at the camera end.)
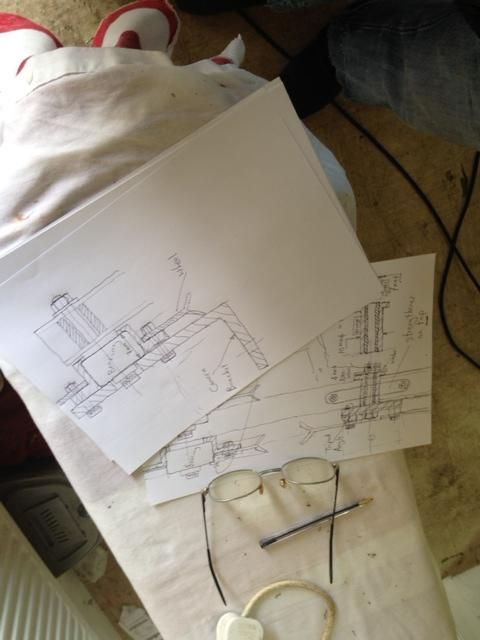 We quickly realised that to control the movement of the Camera platform, we would need to connect the tripod to the end of the arm in some way - a pulley system where one pulley was fixed and one moved proved the best method so that is how it was designed. Due to the parts being quite small, we decided to use bearings for maximum smooth movement and ease of use; this was the most difficult aspect as pieces needed to be machined to accommodate.
After the design and creation of the bearing pieces, however, the assembly was fairly straight forward and it didn't take too long.
Below is a video of the crane working, complete with footage filmed on it. The camera shakes on occasion as it is moving very quickly. This would not be an issue if I had planned the shot and was actually moving it to achieve this.
Subscribe to:
Posts (Atom)